Onshape to Slicer 3D Printing Workflow Guide
Step-by-step Onshape → STL → slicer checklist for Orca, Bambu, Prusa and Cura · free, no signup
See Onshape to Slicer 3D Printing Workflow Guide in action
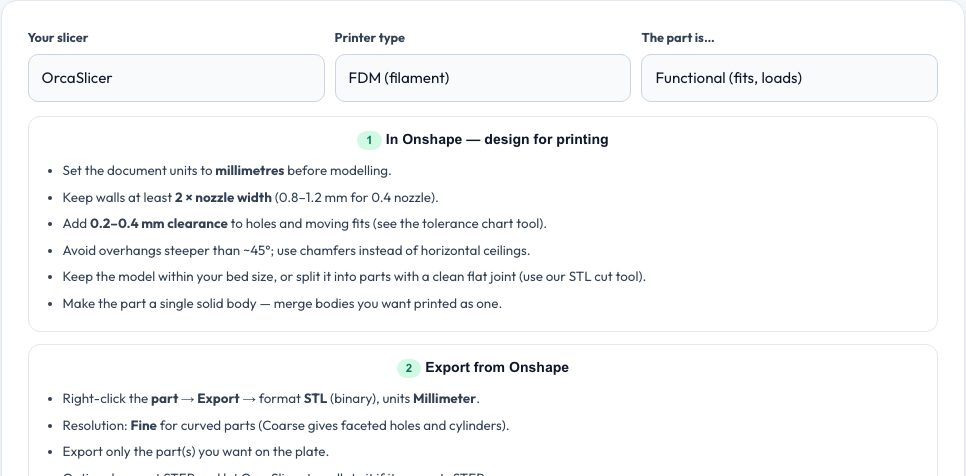
Onshape to Slicer: the 3D Printing Workflow
Going from an Onshape design to a good print has a handful of steps where things commonly go wrong: wrong units, faceted curves from a coarse export, a model that does not fit the bed, a part printed in the weakest orientation. Choose your slicer (Orca, Bambu Studio, PrusaSlicer, Cura), your printer type and whether the part is functional, visual or a prototype, and the guide produces a personalised checklist covering the design rules in Onshape (millimetres, wall thickness, clearances, overhangs, bed size), the STL export settings (binary, millimetres, fine resolution), checks with free tools, how to import and orient in your slicer, and the print settings that suit your part.
Resin printing gets its own advice (layer height, exposure, orientation, drain holes). Copy the checklist as plain text or print it, and jump to the related tools for viewing, repairing, cutting, orienting and estimating the print.
Key features
Personalised checklist
Matches your slicer, printer type and part purpose.
Export settings
STL binary, millimetres, fine resolution and what to select.
Import & orient
Slicer-specific instructions for Orca, Bambu, Prusa and Cura.
Print settings
FDM and resin guidance with layer lines and strength notes.
How to use it
- Choose slicer, printer type and part purpose.
- Follow the numbered checklist.
- Use the linked tools to check, repair or cut the model.
- Copy or print the checklist for reference.
Worked example
Example
For a functional FDM part in PrusaSlicer, the guide recommends millimetres, Fine STL resolution, +0.2–0.4 mm hole clearance, 3–4 perimeters, 25–40% gyroid infill and orienting the part so loads run along the layers.
Who uses this tool
Onshape users new to printing
Avoid common export and orientation mistakes.
Students
A repeatable workflow for coursework.
Instructors
Hand students a checklist.
Tips for the best results
- Always confirm size in the slicer matches Onshape (units!).
- Export at Fine resolution for curved parts.
- Check watertightness before slicing.
- Print a small test of any new tolerance first.
Common mistakes to avoid
- Exporting at Coarse resolution and getting faceted holes.
- Printing in the weakest layer direction for load-bearing parts.
- Forgetting clearances for fits.
Why use AZRS QuickFix?
It is 100% free, needs no signup and has no watermark or usage limits. The tool runs in your browser, so what you type stays on your device, and it works on phones, tablets and desktops. New tools are added every week — bookmark this page or browse the full QuickFix toolbox.
Frequently asked questions
What STL export settings should I use?
Binary, millimetres and Fine resolution for curved parts.
Does it replace my slicer's documentation?
No — it is a workflow checklist; slicer menus change between versions.
Can I use STEP instead?
Bambu Studio and some slicers import STEP directly; STL is the universal choice.
Is it free?
Yes.